You can absolutely start beekeeping in your backyard this season — even with zero experience. A beginner setup costs between $300 and $600, takes up less space than a garden shed, and rewards you with raw honey, local pollination, and one of the most fascinating hobbies you can pick up. This guide walks you through every step, from choosing your first hive to harvesting your first jar of honey.
Some of the links in this article may be affiliate links. If you make a purchase through these links, we may earn a small commission at no extra cost to you. Thank you.
- A complete beginner setup typically costs $300–$600, covering hive, tools, protective gear, and your first colony of bees.
- A healthy first-year hive can produce 25–60 pounds of honey, depending on your local nectar sources and climate.
- Most backyards are suitable for one or two hives — you need outdoor space and a sensible placement spot, not acreage.
- Honey bees pollinate roughly one-third of the global food supply, meaning your hive benefits the entire neighbourhood, not just your own garden.
Why Should You Start Beekeeping in Your Backyard?
Backyard beekeeping has grown steadily in popularity over the past decade, and the reasons aren’t hard to see. Beyond producing your own raw honey, keeping bees gives you a front-row seat to one of nature’s most intricate systems. The seasonal rhythm — colonies swelling in spring, buzzing with activity through summer, and contracting into a quiet cluster for winter — is endlessly interesting to observe and manage.
The environmental benefit is real and measurable. Research from university agricultural extension programmes consistently shows that gardens near active beehives produce higher yields of fruiting vegetables and flowering plants. Your bees typically forage within a two-to-three-mile radius, so your neighbours’ gardens and local green spaces benefit too. Managed backyard hives also help supplement wild pollinator populations that have faced significant pressure from habitat loss and pesticide exposure in recent decades.
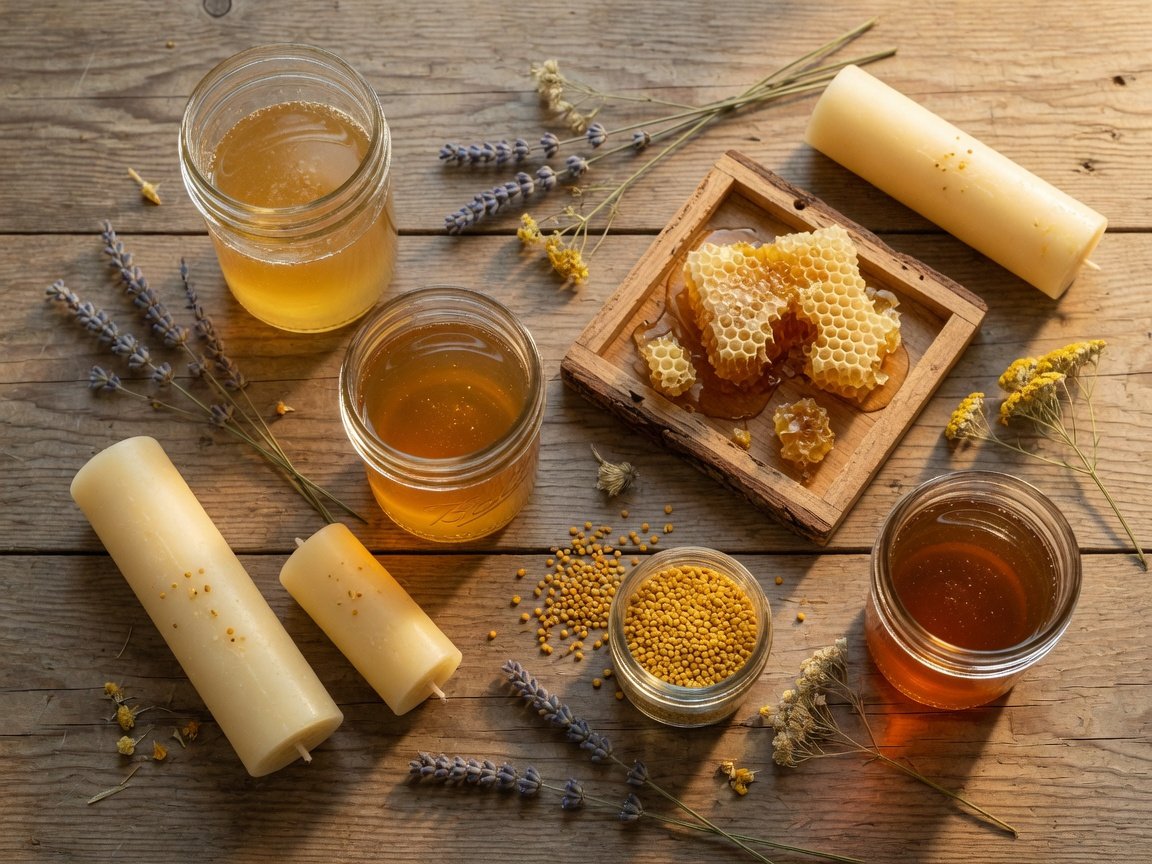
There are practical byproducts beyond honey as well — beeswax for candles and lip balms, propolis with well-documented antimicrobial properties, and pollen collected with a simple hive-entrance trap. If you want a broader picture of why beekeeping matters far beyond the honey jar, the case for keeping bees is stronger than most beginners realise before they start.
Is Backyard Beekeeping Legal Where You Live?
Before you order a single piece of equipment, check your local ordinances. Most cities and suburbs across the United States, United Kingdom, and Australia now permit backyard beekeeping, but the rules vary widely. Some municipalities cap the number of hives permitted on a residential lot. Others set minimum setback distances between hives and property lines, or require you to register hives with a state or county apiary inspector.
Your local authority’s website or a call to the county cooperative extension office is the best starting point. Many US states run free hive registration programmes — registration is often quick and connects you to your state apiarist if a disease problem ever arises. Homeowners association (HOA) rules are a separate consideration; even if your city allows beekeeping, your HOA’s CC&Rs may restrict it, so read those carefully before you invest in equipment.
Talking to a neighbour who already keeps bees in your area is invaluable here. Local beekeeping clubs often maintain region-specific guidance on legal requirements and can point you toward your county or city’s specific registration process.
What Equipment Do You Need to Start Beekeeping?
The core equipment list for a beginner is shorter than most people expect. A single-hive setup and a handful of well-chosen tools will carry you through your first full season. Here is what you will need:
- Hive body — The physical structure your bees will live in. Most beginners start with a Langstroth hive, which uses standardised, interchangeable frames available from any beekeeping supplier.
- Protective suit or jacket with veil — Start with full coverage. Many experienced beekeepers eventually drop the gloves, but beginning with full protection builds confidence and reduces stings while you are still learning to read bee behaviour.
- Gloves — Thick enough to prevent stings, thin enough to feel what you are doing with the frames.
- Hive tool — A flat pry bar used to separate frames and boxes that bees have glued together with propolis. This is non-negotiable — do not inspect without one.
- Smoker — Smoke calms bees by triggering a feeding response and masking alarm pheromones. A quality smoker with a good set of bellows makes inspections significantly more relaxed for both you and the bees.
- Frames and foundation — The internal structure of the hive where bees build comb, store honey, and where the queen lays eggs.
- Feeder — You will likely need to supplement your new colony’s food intake early in the season and in autumn if stores are short.
- Entrance reducer — A small insert that narrows the hive entrance, helping a small new colony defend itself against robbing bees and pests.
Printing out a complete beekeeping supplies checklist before you start shopping is genuinely useful — it is easy to forget smaller items like a queen excluder, mouse guard, or entrance reducer until you need them mid-season and cannot find a local stockist quickly.
How Do You Choose the Right Hive Type?
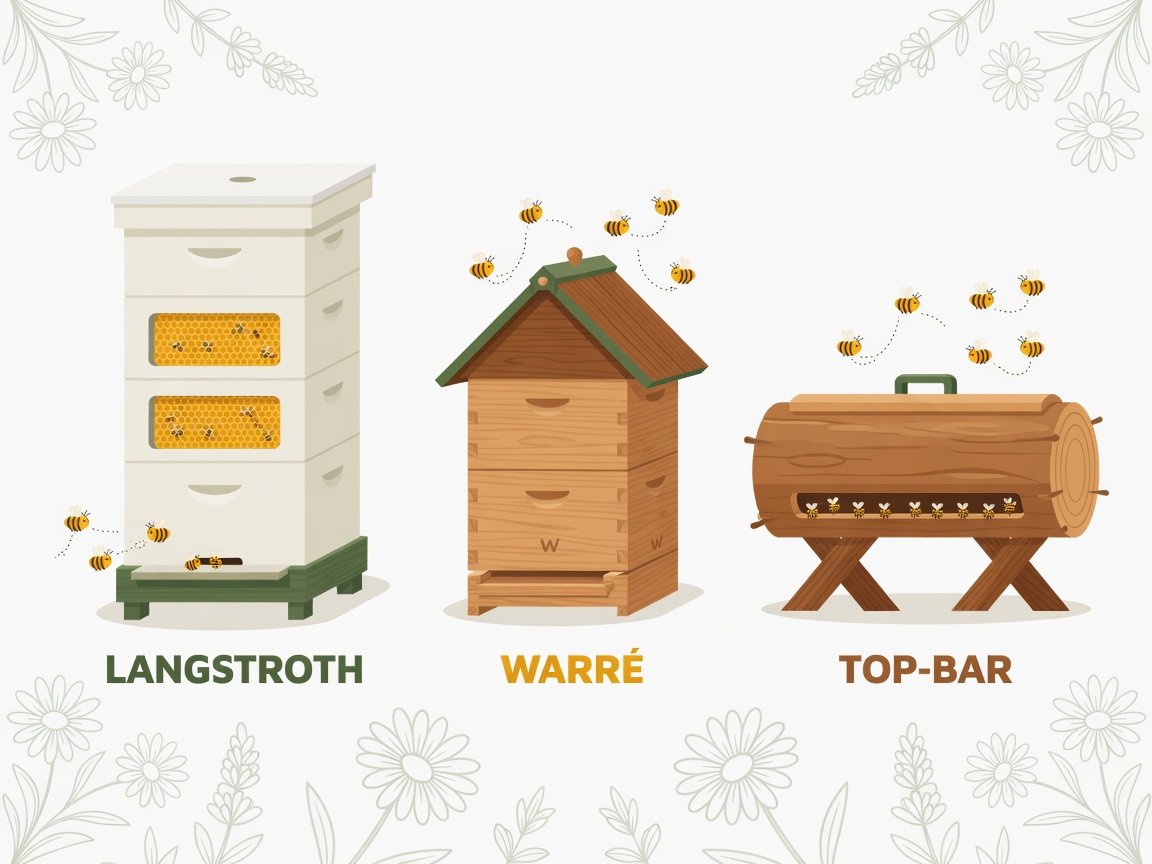
Three hive designs dominate the beginner market: the Langstroth, the Warré, and the top-bar hive. Each has genuine merits, and the right choice depends on your goals, physical capabilities, and how hands-on you want to be with hive management.
| Hive Type | Best For | Management Style | Honey Yield Potential |
|---|---|---|---|
| Langstroth | Most beginners; scalability | Moderate intervention | High (50–100+ lbs) |
| Warré | Low-intervention, natural approach | Minimal intervention | Moderate (20–40 lbs) |
| Top-Bar | Those with back issues; hobbyists | Low intervention | Lower (15–30 lbs) |
The Langstroth is by far the most popular choice in North America and Australia because its frames are standardised and interchangeable. Parts are widely available, local beekeeping clubs are familiar with it, and most beginner courses are taught using Langstroth equipment. For a detailed look at traditional and modern beekeeping approaches compared side by side, it is worth reading before you commit to a hive style — the philosophy behind each system genuinely matters for long-term satisfaction.
The physical quality of the box matters more than most beginners realise. Cheap hive kits often use thin, unseasoned wood that warps after a single season of weather exposure, creating gaps that pests and cold air exploit. Understanding what to look for when selecting the right beekeeping box for your setup — wood thickness, joint quality, and parts availability — is time well spent before your first purchase.
Where Should You Place Your Beehive in the Backyard?
Hive placement has a bigger impact on colony health and neighbour relations than most new beekeepers expect. A few key principles will help you site your hive correctly from the very start:
- Morning sun, afternoon shade. Morning sun triggers early foraging activity. Afternoon shade in hot climates reduces the colony’s energy expenditure on cooling the hive interior.
- Elevated off the ground. A hive stand that raises the bottom board 30–45 cm off the ground improves airflow, discourages skunks and small hive beetles, and reduces the back strain of long inspection sessions.
- Flight path away from foot traffic. Bees leave the hive in a straight line from the entrance. Pointing the entrance toward a fence, hedge, or wall forces bees to gain altitude before entering the shared garden area — the single most effective way to prevent conflicts with neighbours, children, or pets.
- Access to clean water. Bees need water year-round. If no natural source is nearby, provide a shallow dish with landing stones so foragers do not wander to a neighbour’s swimming pool.
- A windbreak in cold climates. Positioning the hive behind a fence, shed, or dense evergreen hedge dramatically reduces heating demands on the winter cluster and improves colony survival rates in areas with harsh winters.
How Do You Get Your First Bees?
You have three main options for sourcing your first colony: a packaged swarm, a nucleus colony (commonly called a nuc), or a full established hive purchased from a retiring beekeeper. Each suits a different situation and budget.
Package bees are shipped in a ventilated box containing approximately 10,000 worker bees and a mated queen. They are the most affordable entry point — typically $120–$175 depending on your location — and are widely available from commercial producers, particularly in the southern United States. The limitation is that the queen and workers are unfamiliar with each other at installation, so the colony needs two to three weeks to bond before it really builds momentum.
Nucleus colonies (nucs) are small but established colonies on four or five frames of drawn comb, brood, honey stores, and a laying queen. Because the colony is already functioning, establishment is faster and first-year survival rates tend to be higher. Nucs cost more — usually $175–$280 — but the improved success rate often justifies the additional investment for a first-time beekeeper.
Established hives from a retiring beekeeper can be excellent value, but they carry the risk of pre-existing disease. Always inspect an established hive alongside an experienced beekeeper before purchasing. A diseased colony is not a deal at any price.
Order early regardless of which option you choose. Reputable suppliers often open their spring order books in January and sell out by February. Missing that window means waiting until late summer for local splits and nucs from fellow club members.
What Does Your First Year of Beekeeping Look Like?
The beekeeping year follows the colony’s natural cycle, and understanding that rhythm is the foundation of confident hive management.
Spring (March–May)
This is the most critical period of the beekeeping year. The colony expands rapidly as the queen ramps up egg-laying to match the incoming nectar flow. Inspect every 7–10 days, ensure the colony has adequate room to grow, and watch for signs of swarm preparation — most visibly, queen cells appearing on the bottom edges of brood frames. Adding a super before the colony feels congested is one of the most important early-season moves a new beekeeper can make.
Summer (June–August)
The main nectar flow arrives in early summer in most temperate regions. Colony populations peak at 40,000–80,000 bees. This is prime honey season — but also prime swarm season, so continue inspecting regularly and keep giving the bees space. Mid-summer is also when Varroa mite populations begin climbing. Monitoring mite loads monthly with an alcohol wash is essential; Varroa destructor is the leading cause of colony loss in managed hives globally, and early detection is far easier to treat than a late-season infestation.
Autumn (September–October)
Harvest honey after the main nectar flow ends but before temperatures drop consistently below 10°C (50°F). After harvest, assess your Varroa load and treat if necessary — this step is non-negotiable. The bees hatching right now are the ones that will carry the colony through winter, and they need to be healthy. Ensure the hive has 15–20 kg of winter stores; if it doesn’t, feed a thick 2:1 sugar syrup until stores are sufficient.
Winter (November–February)
In cold climates, bees form a winter cluster and stop foraging entirely. Your management is minimal: ensure good ventilation (condensation inside the hive kills colonies faster than cold air does), verify stores are sufficient with a quick heft of the hive, and avoid opening the hive below 10°C. Good records from the season make this assessment much easier — knowing your colony’s condition going into winter lets you plan the spring with confidence. Maintaining detailed beekeeping notes throughout the year is one habit that consistently separates beekeepers who overwinter colonies successfully from those who lose them.
How Do You Keep Your Bees Healthy?
Colony health management is where backyard beekeeping moves from a passive hobby to an active stewardship responsibility. The two biggest threats to managed hives are Varroa destructor mite and American foulbrood (AFB) — a bacterial disease that is notifiable in most countries and has no cure. Hives confirmed with AFB must be destroyed by fire, including all equipment.
For Varroa, the evidence-based approach involves monthly mite-load monitoring and treatment when counts exceed approximately 2–3% of your bee population — roughly 1–2 mites per 100 bees in an alcohol wash. Approved treatments vary by country but typically include oxalic acid (highly effective during a broodless winter period), formic acid, and several commercial strip treatments. Your state or national apiary authority maintains a current list of approved options for your region.
Beyond mite management, basic hygiene practices matter significantly. Replace old, dark brood comb every three to five years, as aged comb accumulates disease spores and pesticide residues. Source bees from reputable, disease-tested suppliers, and never accept frames of brood from an unknown colony without a thorough inspection first.
What Are the Most Common Mistakes New Beekeepers Make?
Learning from other people’s mistakes is far less painful than making your own. These errors show up consistently in the first year across beekeeping communities worldwide:
- Inspecting too infrequently. Many beginners worry about disturbing the bees. But irregular inspections let swarms and disease go undetected. Regular, calm inspections are better for the beekeeper and the colony.
- Skipping Varroa monitoring. Many new beekeepers skip treatments until they see dead bees — by which point the colony is already collapsing. Monthly mite counts are non-negotiable.
- Failing to add supers in time. A colony that runs out of space swarms. Add additional honey storage boxes proactively, before the bees feel congested rather than after.
- Harvesting too early or too much. Only harvest frames where at least 75–80% of the cells are capped with wax. Uncapped honey carries too much moisture and will ferment in the jar.
- Working without smoke. Smoke is not optional. Even the calmest colonies become more manageable with a little smoke at the entrance — and on a hot, thundery afternoon, any colony can be defensive regardless of breed.
- Not joining a local beekeeping club. Local clubs provide mentorship, swarm collection networks, and region-specific advice that no online guide fully replicates. Joining in your first year measurably improves your chances of overwintering successfully.
How Much Does It Cost to Start Beekeeping?
Being realistic about costs helps beginners plan without nasty surprises. Here is a straightforward breakdown for a single-hive setup in the United States:
| Item | Estimated Cost (USD) |
|---|---|
| Langstroth hive (two deep boxes, frames, foundation) | $150–$250 |
| Protective suit or jacket and veil | $50–$120 |
| Gloves | $15–$30 |
| Smoker | $30–$60 |
| Hive tool | $10–$20 |
| Feeder | $15–$35 |
| Package bees or nucleus colony | $120–$280 |
| Beginner course or reference book | $0–$50 |
| Total (approximate) | $390–$845 |
Ongoing costs in subsequent years drop substantially. You will mainly be replacing consumables — smoker fuel, sugar for feeding, and occasional replacement frames. A well-maintained hive can pay for itself within two or three harvests if you sell or barter surplus honey locally.
Joining a local beekeeping club often gives access to shared equipment like honey extractors — a tool you need once or twice a year that costs $200–$500 to buy outright. That one membership benefit alone can offset the annual club fee many times over.
What Can You Harvest From Your Backyard Hive?
Honey is the headline product, but a productive backyard hive offers several harvestable goods worth knowing about before you start:
- Honey. A productive first-year Langstroth hive in a good nectar region typically yields 25–60 pounds. Established second- and third-year hives in good seasons can exceed 100 pounds.
- Beeswax. Recovered during the honey uncapping process — expect 1–2 pounds of clean wax per 60 pounds of honey. Used for candles, cosmetics, wood polish, and reusable food wraps.
- Propolis. A resinous substance bees collect from tree buds and bark, valued for its antimicrobial properties. Extracting it in useful quantities requires a simple propolis trap fitted inside the hive lid.
- Pollen. Collected with a pollen trap fitted at the hive entrance for short periods. Rich in protein and used as a nutritional supplement — only remove it in small quantities so the colony retains adequate stores.
- Nucleus colonies (splits). Once you are comfortable managing your hive, you can split a strong spring colony to create a second hive — or sell the split to another beginning beekeeper, recovering some of your original investment.
Where Should You Go to Learn More?
The best beekeepers are perpetual students. Beyond this guide, three resources will accelerate your learning more than anything else:
- A local beekeeping club. Nothing replaces a hands-on mentor who knows your local flora, pest pressures, and seasonal patterns. Most national beekeeping associations maintain a searchable club directory on their websites.
- A beginner beekeeping course. Many clubs and agricultural colleges offer one- or two-day practical courses in spring. Handling bees with a confident, experienced instructor present is the fastest way to build genuine confidence at the hive.
- A reliable book. Beekeeping literature ranges from excellent to outdated and contradictory. Starting with a well-chosen beginner beekeeping book means building on solid, tested foundations rather than piecing together conflicting advice from scattered internet forums.
University cooperative extension services publish free, region-specific beekeeping guides that are among the most reliable beginner resources available anywhere. Your state or county extension office website is worth a quick search before you spend money on paid resources.
Frequently Asked Questions About Starting Backyard Beekeeping
How much space do I need to keep bees in my backyard?
You can keep a productive hive in a surprisingly small backyard. The hive itself occupies roughly half a square metre of ground space. With thoughtful placement — entrance pointed toward a fence or hedge so bees gain altitude quickly before entering the shared garden — you can maintain a healthy colony in an urban garden. It is the direction of the flight path, not the total size of your garden, that matters most for peaceful coexistence with neighbours.
Do I need to tell my neighbours before I start beekeeping?
You are generally not legally required to notify neighbours, but doing so almost always pays off. A brief conversation — especially with whoever’s garden backs closest to your hive — prevents misunderstandings and generates goodwill, particularly when you hand over a jar of honey at the end of the season. Beekeeping disputes between neighbours are almost always rooted in a lack of communication rather than any real problem with the bees themselves.
How long before I can harvest honey from a new hive?
Plan for patience in year one. A package or nuc installed in spring will spend most of that first season drawing comb, raising brood, and building winter stores. Many first-year beekeepers harvest a modest amount — perhaps 10–30 pounds — if the nectar flow is strong. A genuine bumper harvest is more realistic in year two, once the colony is fully established on drawn comb and the queen is laying at full capacity.
Which type of bee is best for beginners?
Italian honey bees (Apis mellifera ligustica) are widely recommended for beginners because they are calm, productive, and relatively predictable. Carniolan bees are also popular — they build up rapidly in spring, overwinter well on smaller food stores, and are notably gentle. Buying from a local, reputable breeder who actively selects for gentle temperament gives you the best possible foundation for a smooth first season.
What happens if my bees swarm?
Swarming is a natural part of colony reproduction — a portion of the population, including the old queen, leaves to find a new home. A swarm cluster is almost always docile and will settle on a nearby surface for a few hours to a few days while scouts search for a permanent cavity. You can collect your own swarm to rehive it, or contact your local beekeeping club’s swarm collection list. The most reliable prevention is giving your colony ample space in spring, before they feel the urge to leave.
Is beekeeping safe if I have a mild bee sting allergy?
A mild local reaction — redness and swelling centred on the sting site — is a normal physiological response, not the same as a dangerous systemic allergy. If you have previously experienced systemic reactions (hives spreading beyond the sting site, throat tightening, difficulty breathing, or anaphylaxis), see an allergist before starting beekeeping. Venom immunotherapy is highly effective for people with systemic sensitivities and allows many allergy sufferers to keep bees safely. Your GP is the right first call — not a beekeeping forum.
Your Next Steps: A Realistic Timeline to Your First Hive
Getting started in backyard beekeeping is completely achievable within a single season with the right preparation. Here is a realistic month-by-month plan:
- January–February: Check local ordinances, join a beekeeping club, order bees from a reputable supplier (do this early — suppliers sell out fast), and start reading.
- February–March: Purchase and assemble your hive equipment. Choose your hive site and build or buy a solid hive stand.
- April–May: Install your bees, begin weekly inspections, and supplement feed with sugar syrup if necessary.
- June–August: Manage colony growth, add supers as needed, and monitor Varroa mite loads monthly. Enjoy watching your colony build through the main nectar flow.
- September–October: Harvest your honey, treat for Varroa if counts are elevated, confirm winter stores are sufficient, and close the hive up for winter.
Beekeeping rewards patience, careful observation, and a genuine willingness to keep learning. Every season teaches you something new, and every colony is different. The bees will be your most instructive teachers — but a solid foundation of knowledge, quality equipment, and a local support network will make the whole journey far more enjoyable. Start simply, stay curious, and the honey will follow.
—
Pingback: How to Make a Beekeeping Box - rwgreeff.com
Pingback: how to start beekeeping for free - rwgreeff.com