The most effective way to prevent beekeeping stings is simpler than most beginners expect: wear properly fitted gear, use your smoker with intention, and move slowly and deliberately around the hive. Most stings don’t happen because bees are aggressive — they happen because of small, fixable gaps in preparation and technique that are completely within your control.
Some of the links in this article may be affiliate links. If you make a purchase through these links, we may earn a small commission at no extra cost to you. Thank you.
Key takeaways from this guide:
- A well-fitted veil, suit, and gloves prevent the majority of stings during hive inspections.
- Correct smoker technique masks the alarm pheromones that trigger defensive bee behavior.
- Slow, deliberate movement and smart timing reduce sting risk as much as any piece of gear.
- Knowing how to respond quickly when a sting does happen is just as important as prevention.
Why Do Bees Sting in the First Place?
Honeybees don’t sting for sport. Every worker bee’s sting is a last-resort defense that ends in her death — it’s reserved for genuine threats to the colony. The trouble is that ordinary beekeeping activities can accidentally trigger those threat signals if you’re not aware of what you’re doing. When a bee stings, she releases an alarm pheromone that signals nearby bees to join the defense. One sting can escalate quickly if you don’t respond correctly.
The most common triggers are all preventable: sudden vibrations from a dropped tool, the accidental crushing of a bee between two frames, dark clothing that resembles natural predators like bears, or working the hive without smoke to mask chemical alarm signals. Beekeeping experts widely agree that the vast majority of stings during inspections can be traced back to one of these avoidable causes — and addressing them systematically is exactly what this guide is about.
If you’re just starting out, getting a solid grounding in what beekeeping actually involves before your first hive visit gives you the contextual knowledge to build safe habits from day one, rather than learning them the hard way.
Your Protective Gear: The First and Most Important Line of Defense
Think of your beekeeping protective clothing the way you’d think of a seatbelt — it doesn’t eliminate all risk, but it changes the outcome significantly when things don’t go to plan. Protective gear is sting-resistant, not sting-proof, which means fit and inspection habits matter as much as the quality of the fabric itself. Beekeeping practitioners consistently report that the majority of gear-related stings occur at gaps: an untucked sleeve, a loose cuff, or a zipper left a centimeter open.
Bees are remarkably good at finding these weak points, especially during inspections on warmer days when the colony is more active. Running a quick pre-inspection checklist takes less than two minutes and prevents almost all gear-related stings:
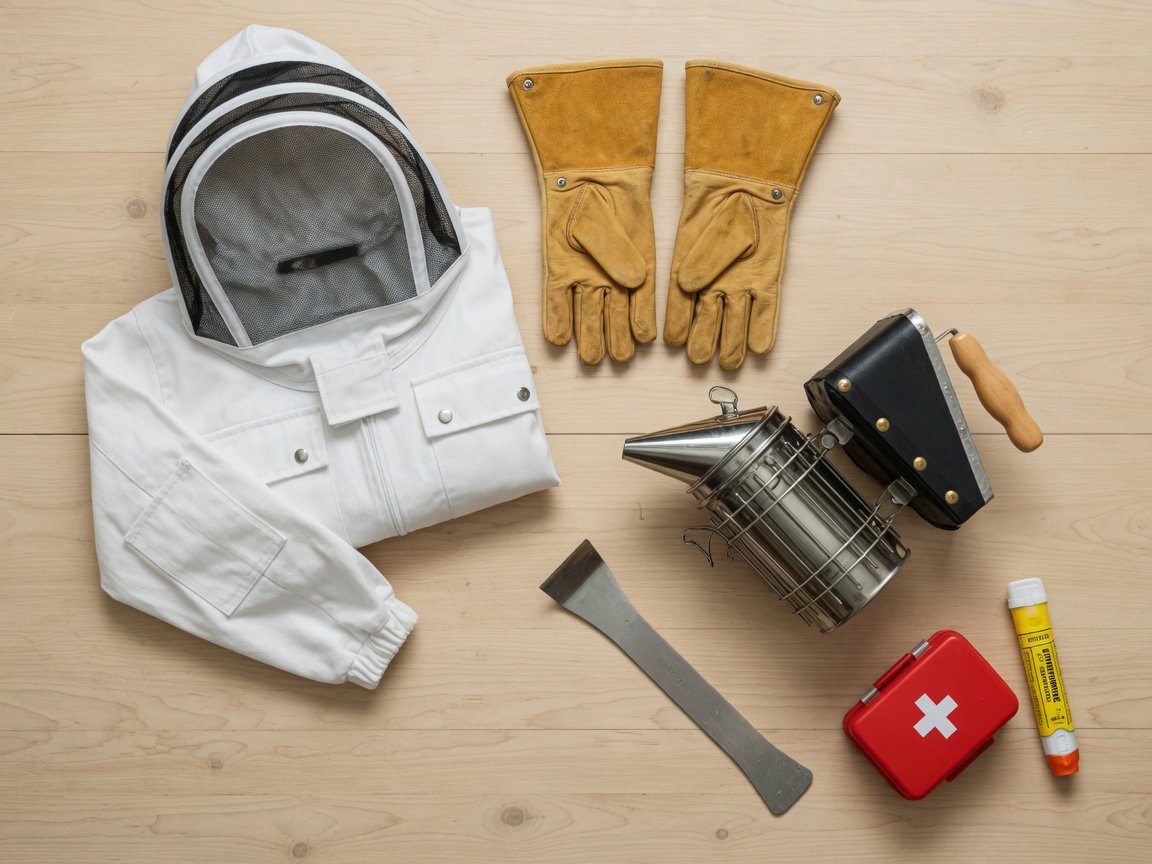
- Suit or jacket: Check for tears, thin patches, and pulled seams — run your hand along every seam line.
- Veil: Inspect mesh spacing and attachment points. Hold it to the light to spot holes you’d otherwise miss.
- Gloves: Ensure they overlap your jacket cuffs by at least two inches with no skin or fabric gap bees can slip through.
- Boots: Tuck trouser legs inside and confirm boot tops are secure. Bees will reliably find unprotected ankles.
- Zippers: Close and double-check every zipper, especially the veil-to-jacket attachment point.
- Movement test: Crouch, reach up, and twist before you approach the hive. Any gap that appears needs to be fixed before you go further.
Replace compromised gear before it fails in the field. A needle, thread, and patch of matching fabric kept in your apiary box handles minor tears on the spot. For major damage — fabric so thin it offers no real resistance — replacement is the only safe option.
How to Choose the Right Bee Veil and Headgear
Your veil is non-negotiable. It’s the single piece of equipment that must be worn on every hive visit without exception, and it needs to cover your full face and neck with no gaps. The two main styles are round freestanding veils worn with a pith hat, and integrated helmet-style veils that attach to a jacket or full suit hood. Integrated styles tend to seal better because the attachment to the suit collar is purpose-built rather than improvised.
Mesh spacing is more critical than most beginners realize. A mesh too coarse allows smaller bees to insert their stingers through the openings. A quality veil mesh should be fine enough that you cannot easily press a fingernail through it, while still offering clear visibility and good airflow — both of which affect how comfortable and confident you are during an inspection. Visibility matters more than you might think: you need to see exactly what your hands are doing when they’re close to a frame covered in bees.
A few practical tips on veil selection:
- Check that the veil attaches securely to the suit collar with zero gap where bees could crawl up inside the hood
- If you wear glasses, try the veil on with them before buying — you need adequate clearance from the mesh for comfort
- Integrated veil-jacket combinations seal more reliably than mix-and-match setups from different manufacturers
- If you have a known or suspected severe bee allergy, keep an epinephrine auto-injector in an exterior suit pocket where you can reach it with one hand
Gloves, Boots, and How to Layer Properly
Gloves are a point of debate in the beekeeping community. Some experienced beekeepers prefer working gloveless because thick gloves reduce dexterity and increase the chance of accidentally crushing bees — which, as you now know, triggers exactly the defensive response you’re trying to avoid. For beginners, though, gloves are strongly recommended. You’re still building the slow, deliberate hand movements that keep bees from getting squashed in the first place.
Leather gauntlet-style gloves with long cuffs offer the best sting protection. Nitrile gloves are a popular step-down for more experienced beekeepers wanting better tactile feel — less protective, but significantly better than nothing. Whatever type you choose, the cuff must overlap your jacket sleeve by several inches with no exposed gap. Here’s the correct layering sequence from the skin out:
- A light, breathable base layer to manage sweat during warm-weather inspections
- A long-sleeve shirt and full-length trousers — thicker fabric provides an extra buffer even under the suit
- Your bee suit or jacket over the clothing layers
- Veil attached and fully secured before approaching the hive
- Gloves last, with gauntlet cuffs tucked over jacket sleeves
- Movement test — crouch, reach, twist — before picking up the smoker
Avoid dark colors where possible. Black and dark brown clothing resembles bears and other natural predators, triggering defensive behavior in colonies that might otherwise stay perfectly calm. Light-colored cotton or polycotton suits are standard for good reason.
Mastering the Smoker: Your Most Powerful Sting Prevention Tool
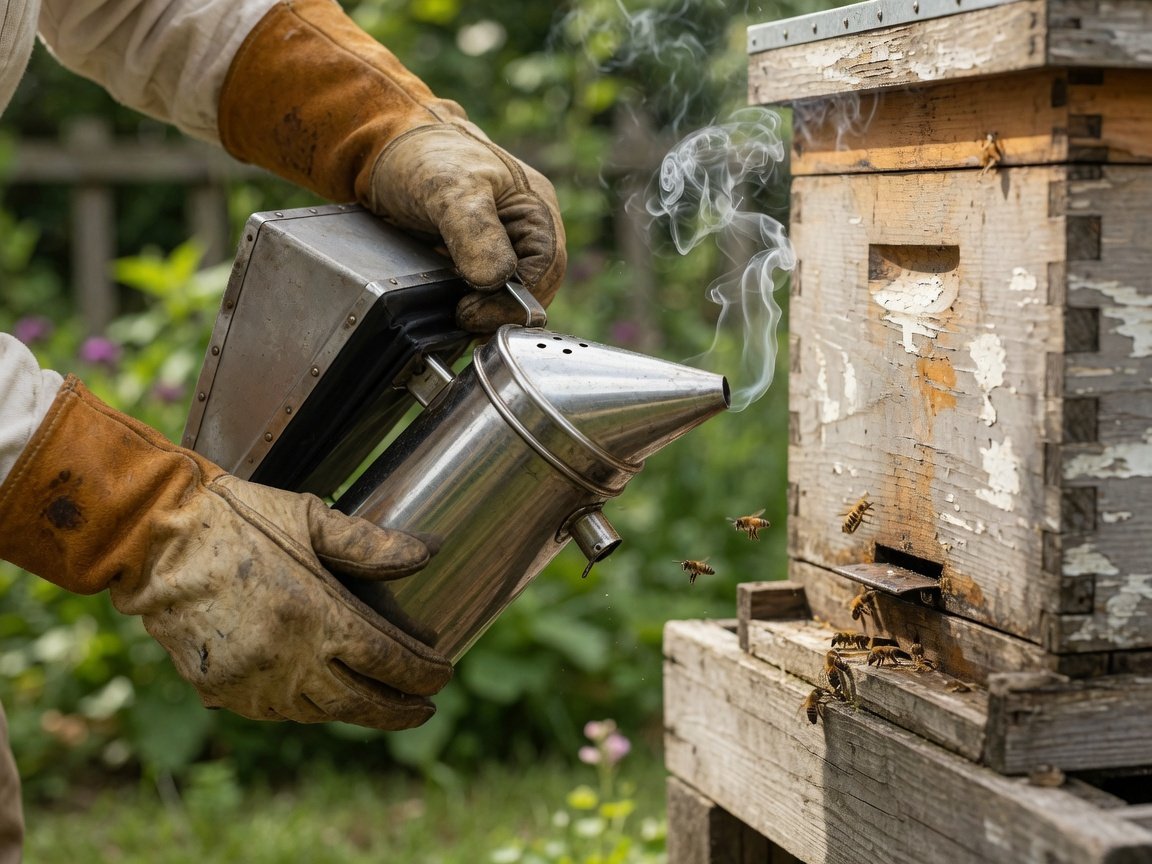
A well-used smoker is worth more than the most expensive bee suit. Smoke works on two levels simultaneously: it masks the alarm pheromones that trigger defensive cascades, and it prompts bees to gorge on honey in anticipation of a perceived fire — a full bee is a significantly calmer bee. The critical qualifier is “well-used.” Too little smoke does nothing useful. Too much can overstress the colony and make a difficult inspection noticeably worse.
Different fuel types each have strengths and trade-offs worth knowing before you commit to one:
| Fuel Type | Burn Duration | Smoke Quality | Best For |
|---|---|---|---|
| Pine needles | Short–medium | Cool, light | Easy to source; good for shorter inspections |
| Burlap (hessian) | Medium–long | Dense, reliable | Most popular beginner choice |
| Wood pellets | Long | Consistent, clean | Predictable burns; low ash output |
| Commercial fuel bricks | Long | Dense | Maximum convenience; higher cost |
| Dried lavender or herbs | Short | Light, aromatic | Pleasant scent; needs frequent reloading |
To use your smoker effectively: get a steady cool smoke going, puff two to three times at the hive entrance, and wait 30 seconds before lifting the cover. Add one or two light puffs under the inner cover as you open it. During the inspection, use gentle puffs to move bees away from frames rather than brushing or squashing them. If bees start bouncing off your veil with intensity, a few extra puffs directly over the top bars usually settles things quickly.
Here’s a simple test: hold your hand six inches from the smoker nozzle. If you can’t hold it there comfortably for two full seconds, the smoke is too hot. Hot smoke irritates bees rather than calming them, and it can damage the colony — so let the smoker breathe before continuing.
How Your Behavior Affects Sting Risk
Gear and smoke set the stage, but your behavior during the inspection is what determines whether the colony stays calm or escalates. Bees are sensitive to vibration, sudden movements, and certain scents. Once you understand this, every decision during an inspection — how fast you move, when you reach for a frame, whether you swat a bee off your sleeve — starts to make sense as a direct sting prevention choice.
Experienced beekeepers consistently rely on a handful of core behavioral principles:
- Move slowly and deliberately. Quick, jerky movements register as threats. Think of every action as if you’re moving through water — smooth, continuous, unhurried.
- Avoid strong scents. Perfume, strong deodorant, and even some sunscreens can agitate bees. Wash your hands thoroughly and skip scented products on inspection days.
- Never swat. If a bee lands on you, stay still or gently brush it away. Swatting crushes bees and releases alarm pheromone right next to your body.
- Time your inspections well. Warm, sunny days between 10am and 2pm are optimal — forager bees are out working, so the hive population is lower and calmer. Cold, windy, or overcast days make colonies noticeably more defensive.
- Work with the grain. Remove and replace frames smoothly, keeping them level and moving parallel to the hive body to avoid rolling bees against each other and the box wall.
The management approach you choose for your hive also influences sting frequency over time. Regular, calm inspections teach the colony that human presence isn’t a threat — and experienced beekeepers often find that their most-handled colonies are among their most settled.
A Step-by-Step Safe Hive Inspection Routine
Routine turns good habits into automatic behavior. A consistent inspection sequence means you never arrive at the hive wondering what you’re supposed to do next — and that calm confidence shows in how you move. Here’s a reliable full sequence from approaching the yard to closing up:
- Suit up away from the hive. Fully gear up at least 15 metres from the entrance. Don’t rush through this step.
- Light your smoker and establish a steady cool smoke before you approach the hive.
- Approach from the side or rear of the hive, never straight in from the front entrance where bees are actively flying in and out.
- Puff two to three times at the entrance and wait 30 seconds for the smoke to take effect before opening anything.
- Lift the outer cover slowly, adding one or two puffs under it before fully removing it.
- Work frame by frame from one end, replacing each frame carefully and fully before moving to the next.
- Keep frame movements parallel to the hive body to avoid rolling bees between the frame and the box wall.
- Close up slowly and deliberately. Rushing the close is when late-inspection stings most often happen.
- Step away from the entrance area before removing any gear — some bees will follow you briefly.
- Record what you observed. Keeping detailed hive inspection notes helps you track colony temperament trends and plan safer, better-informed future visits.
First Aid When a Sting Happens Anyway
Even the most experienced beekeepers get stung occasionally. A calm, practiced response limits the reaction and prevents one sting from becoming many. Most people experience a normal local response — sharp pain at the site, redness, swelling, and itching that resolves within a few hours to a day. Knowing the difference between a normal response and an allergic one is a skill every beekeeper needs to develop before it becomes relevant in the field.
Immediate steps for a normal sting:
- Scrape the stinger out — don’t pinch it. Use a hive tool, fingernail, or card edge. Pinching the venom sac pumps more venom into the wound.
- Move away from the hive immediately to avoid the alarm pheromone attracting further stings.
- Wash the sting site with soap and water.
- Apply a cold pack wrapped in cloth for 10 minutes to reduce swelling and pain.
- Take an antihistamine if available to ease itching and local inflammation.
- Monitor for 30 minutes for any signs of a wider reaction beyond the immediate sting site.
Signs that need emergency attention: widespread hives or rash away from the sting site, swelling of the throat or lips, difficulty breathing, dizziness, nausea, or a rapid drop in blood pressure. These are signs of anaphylaxis — a serious allergic reaction that requires an epinephrine auto-injector and emergency services immediately. Anyone with a known or suspected bee allergy must carry an EpiPen to the hive on every single visit, in a suit pocket where it’s reachable — not a bag left at the car. If it’s used, call emergency services right away, even if symptoms seem to improve.
For a comprehensive look at the medical side of sting reactions and long-term allergy management, this in-depth resource on beekeeping sting prevention, treatment, and what every beekeeper should know covers the topic thoroughly.
Maintaining and Storing Your Protective Gear
Your gear is only as good as the condition it’s kept in. A bee suit with a hidden tear from last season is worse than useless — it provides false confidence while offering incomplete protection. Building a simple maintenance habit around each inspection costs about five minutes and consistently prevents the stings that always seem to happen at the worst possible moment.
After each inspection:
- Brush or shake off any bees or propolis before removing the suit
- Check for tears, worn patches, and loose seams while the inspection is fresh in your mind
- Air the suit out before storing — trapped moisture promotes fabric degradation and attracts pests
- Store in a dry, ventilated space away from direct sunlight and chemicals
- Hang jackets on a hook or hanger to prevent crease lines that stress seams over time
When to replace key items:
- Gloves: Replace when the leather thins, stitching weakens, or any pin-hole develops
- Veil: Replace if any mesh hole appears or the seam attachment begins to loosen
- Full suit: Inspect twice per season; replace panels or the full suit when fabric thins at stress points like elbows and knees
- Zippers: A sticky or gapping zipper is a replacement trigger — don’t wrestle with it next to the hive
Colonies that are consistently more defensive than average are also worth addressing at the management level. Requeening can produce noticeably calmer bees within a few weeks, often transforming a stressful inspection into a straightforward one. It’s one of the most underused sting prevention tools available to beekeepers at any experience level.
Frequently Asked Questions About Preventing Beekeeping Stings
How many stings does it take to build up immunity?
There’s no reliable number. Some beekeepers notice milder local reactions after repeated exposure as the immune system adjusts, but others develop increased sensitivity over time. Because responses are so individual, it’s not safe to assume you’ll build tolerance — consistent prevention is the right approach regardless of how long you’ve been keeping bees.
Is a full bee suit necessary, or can I get away with just a veil?
A veil is the minimum and must never be skipped. Whether you need a full suit depends on your comfort level, the temperament of your colony, and the nature of the inspection. A quick, focused check might be manageable with a veil and gloves; a full inspection on a defensive hive warrants a full suit every time. When in doubt, suit up completely — the extra few minutes are always worth it.
Why are bees more aggressive at certain times of year?
Late summer and early autumn are typically the most defensive periods. The colony is protecting a large honey store ahead of winter, forager numbers are at their peak, and nectar flows have slowed — making bees more territorial about the hive. Cold, overcast, or windy weather also increases defensiveness year-round, regardless of season. Knowing your local patterns helps you time inspections to calmer windows and prepare accordingly.
Can hive placement reduce how often I get stung?
Yes — thoughtful placement makes a genuine, practical difference. Position hives so the entrance faces away from foot traffic areas, ideally pointing toward a fence or dense hedge so bees fly up and over paths rather than through them. Good airflow around the hive keeps bees comfortable and less prone to the overheating that contributes to defensive behavior. A stable, level surface also minimizes the hive vibrations that put colonies on high alert.
How do I know if I’m allergic to bee stings?
The only reliable way to determine allergy status is through skin testing or a blood test ordered by a doctor or allergist. A large local reaction — significant swelling around the sting site — is common and not in itself a sign of systemic allergy. The warning signs of a genuine allergic response are distinct: hives or rash away from the sting site, throat or lip swelling, difficulty breathing, or dizziness. If you’ve ever experienced a broader reaction to a sting, see an allergist before working bees again.
Does the type of hive I use affect sting frequency?
It can, mostly through how much the inspection method disturbs the colony. Different hive designs require different movement patterns and create different levels of disruption during routine checks. If you’re still weighing up your options, this comparison of different beekeeping types and methods is a useful starting point for understanding which approach might suit your management style and comfort level best.
What’s the difference between a honeybee sting and a wasp sting medically?
Honeybees leave a barbed stinger embedded in the skin that continues pumping venom after the sting — which is exactly why scraping it out quickly (rather than pinching) matters so much. Wasps don’t leave a stinger, can sting multiple times, and inject a different venom composition. Medically, the immune response patterns differ between the two, which is why allergy testing specifically distinguishes between bee and wasp venom sensitivity. A reaction to one doesn’t automatically mean a reaction to the other.
Your Next Steps: Making Sting Prevention a Natural Habit
Preventing beekeeping stings isn’t a single action you take once — it’s a collection of small, consistent habits that compound over time into a genuinely safer experience. Start with gear: get everything properly fitted and build the pre-inspection checklist into your routine before you ever approach the hive. Then work on your smoker technique, which takes a few practice sessions away from the hive to feel natural. Finally, slow everything down. Almost every experienced beekeeper who significantly reduced their sting frequency says the same thing: they just started moving slower and stopped rushing.
If you’re building your skills from the ground up, pairing hands-on hive time with solid reading makes a measurable difference in how quickly confident habits develop. The best beginner beekeeping books cover protective techniques, hive management, and bee behavior in depth — excellent foundational reading before your first solo inspection.
A practical timeline to work toward:
- Week 1–2: Source and fit-test your gear; practice lighting and maintaining your smoker away from the hive
- First inspection: Suit up fully, prioritize observation over completing tasks, and focus on moving slowly throughout
- First month: Build your inspection routine into consistent habit and start keeping hive notes after each visit
- End of first season: Assess gear condition, replace anything worn, and review your notes for colony temperament patterns to plan next season smartly
The goal isn’t to be fearless — it’s to be prepared. Bees are manageable and genuinely rewarding animals to work with when you understand what drives their behavior, and the beekeepers who get stung least are simply the ones who respect that dynamic consistently and keep their preparation sharp every single visit.